
bathroom design tips
Once only considered a utility space bathrooms are now designed with wellness in mind, combining the layered look
of living spaces, dayspa-like features, and clever technology.
With everything going on in the world we need a restorative space to relax and unwind, and a well-designed bathroom
can be the perfect sanctuary.
Play out the layout
First up, assess whether the current bathroom layout works. A good bathroom layout sees a functional spatial relationship between the vanity, shower, bath and toilet. The layout can be changed; however, keeping the plumbing in the same place will save costs.
Look into your bathroom from the door and decide which wall will be your focal point. This is the wall that will be the design hero, whether it features statement tiles, a gorgeous vanity/mirror/wall light combo, or a wow freestanding bath. The hero wall should be easily seen rather than tucked out of view.
Tip
Don’t put your loo in the view; position it out of the eyeline from the door. It’s not the most inspiring first impression, and can get awkward if you open the door on someone.

Let there be luxe
Gone are the days of the utilitarian bathroom! Design your bathroom like a living room, with mixed materials, colour and pattern, elegant hardware and statement light fittings — I love a chandelier in a bathroom! Add luxe accessories such as an orchid plant to create a tailored and elegant look.
Tip
A simple grouping of hand wash and body lotion in beautiful bottles adds a bespoke feel, and plump towels in a quality thread count help up the pamper factor.
Trade aid
Renovating a bathroom requires almost every trade you can think of working in an often small space, and often needing to return multiple times. This process can be a disaster on your timeline, budget and stress levels unless it’s managed properly. Having a builder manage the trades, or a good project manager, may cost a little more but the process will run smoothly. If you’re taking on a bathroom reno yourself, make sure you understand the process first and have a clear brief, timeline, plans and product pre-organised.
Even footing
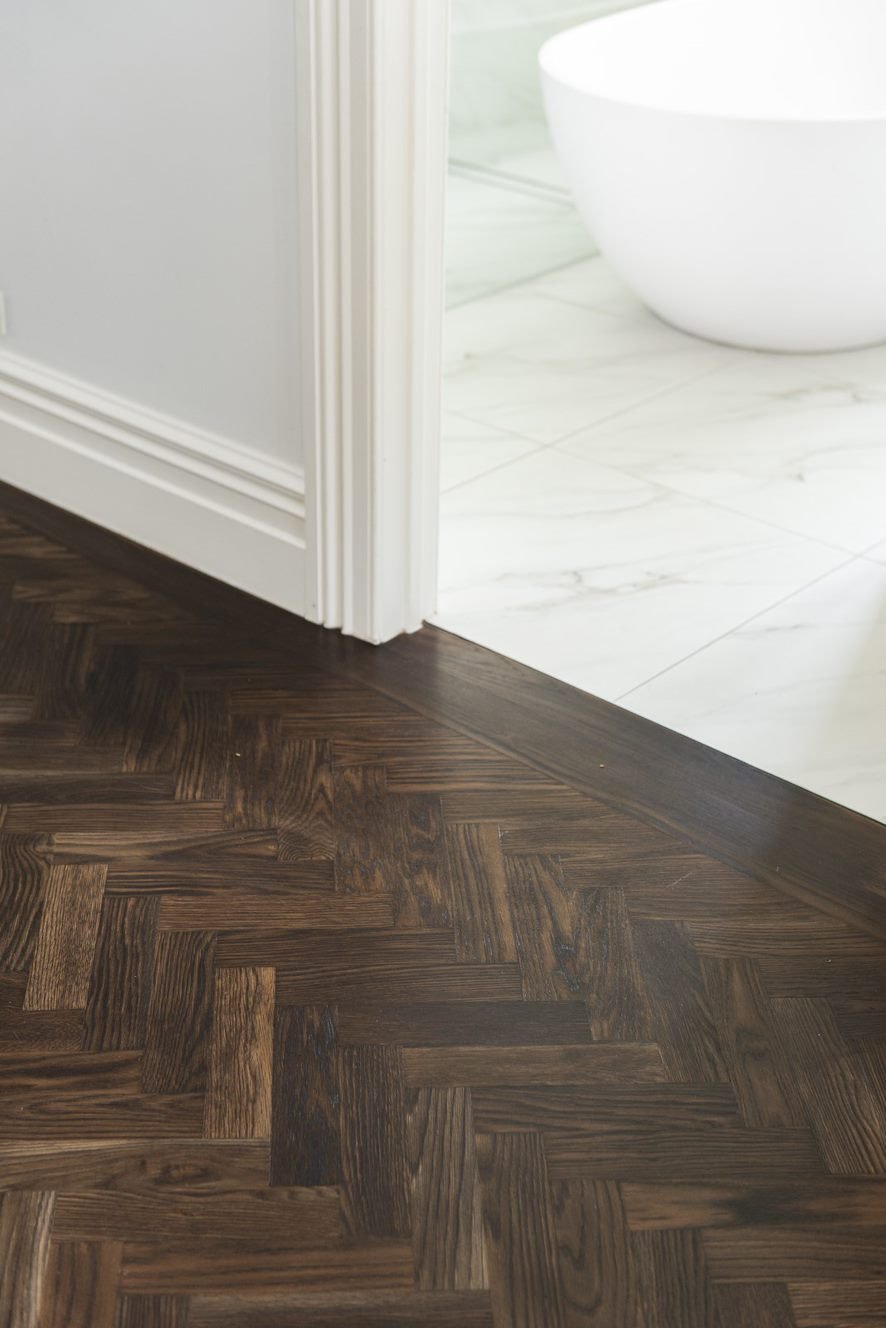
A well-designed foundation has transitions between rooms and flooring types at the same level. When the bathroom has been gutted, make sure the floor is prepped so that when finished, the tile is level to the adjacent flooring (this may mean dropping the floor joists if you have a thick natural stone).
Tip
Fork out for underfloor heating if you can — the pleasure outweighs the cost upfront!
Baths — freestanding vs built-in
For me, built-in vs freestanding depends on how much space I have available. If I have to fit a shower over the bath, then built-in is the way to go. Likewise, if I’m fitting a bath into a small space between two walls I’ll always go built-in as it looks like part of the architecture, whereas a freestanding bath would look cramped and be impossible to clean around. I also love the ledge around a built-in bath — it can be used for sitting, styling or resting a glass of wine!
The key with a built-in bath is making it look high-end, and the best way to do this is a tiled top. Buy a drop-in bath with a flat top so you can mount it under the tiles rather than on top. The tiler or stone fabricator mitres the corners (cuts them on angles) so the tile fits together in a perfect point.
Tip
A back-to-wall bath is a handy hybrid between built-in and freestanding. The back of the bath is sealed to the wall, but the sides are not.

Power points
Place plug sockets in one of your drawers for easy access to a hairdryer and straightener without the trouble. You can also have a power point on the hidden side of a vanity too. If you use an electric toothbrush, think about adding a power source in your mirrored vanity.
Get the right light
Task lighting mounted above the mirror can cast unflattering shadows and make you look ten years older. Instead, mount a pair of sconces at eye level on either side of the mirror for an even and flattering spread of light.
Skylights are a secret design weapon, especially for a small-space bathroom. They keep wall space functional, while letting natural light pour in. Positioned above the bath or shower they create a resort-like feel and you can even watch the stars at night!
I love a feature light in the bathroom! If a pendant hangs too low, choose a flush mount light that’s still a statement but attached to the ceiling.
Bathrooms are a great place to use LED lights on sensors. Not only do they create a sexy glow and highlight design features like cabinetry, they’re also practical for night-time trips to the bathroom.
Look for useful tech features like sensor lighting, automatically flushing toilets and bathroom mirrors that demist.

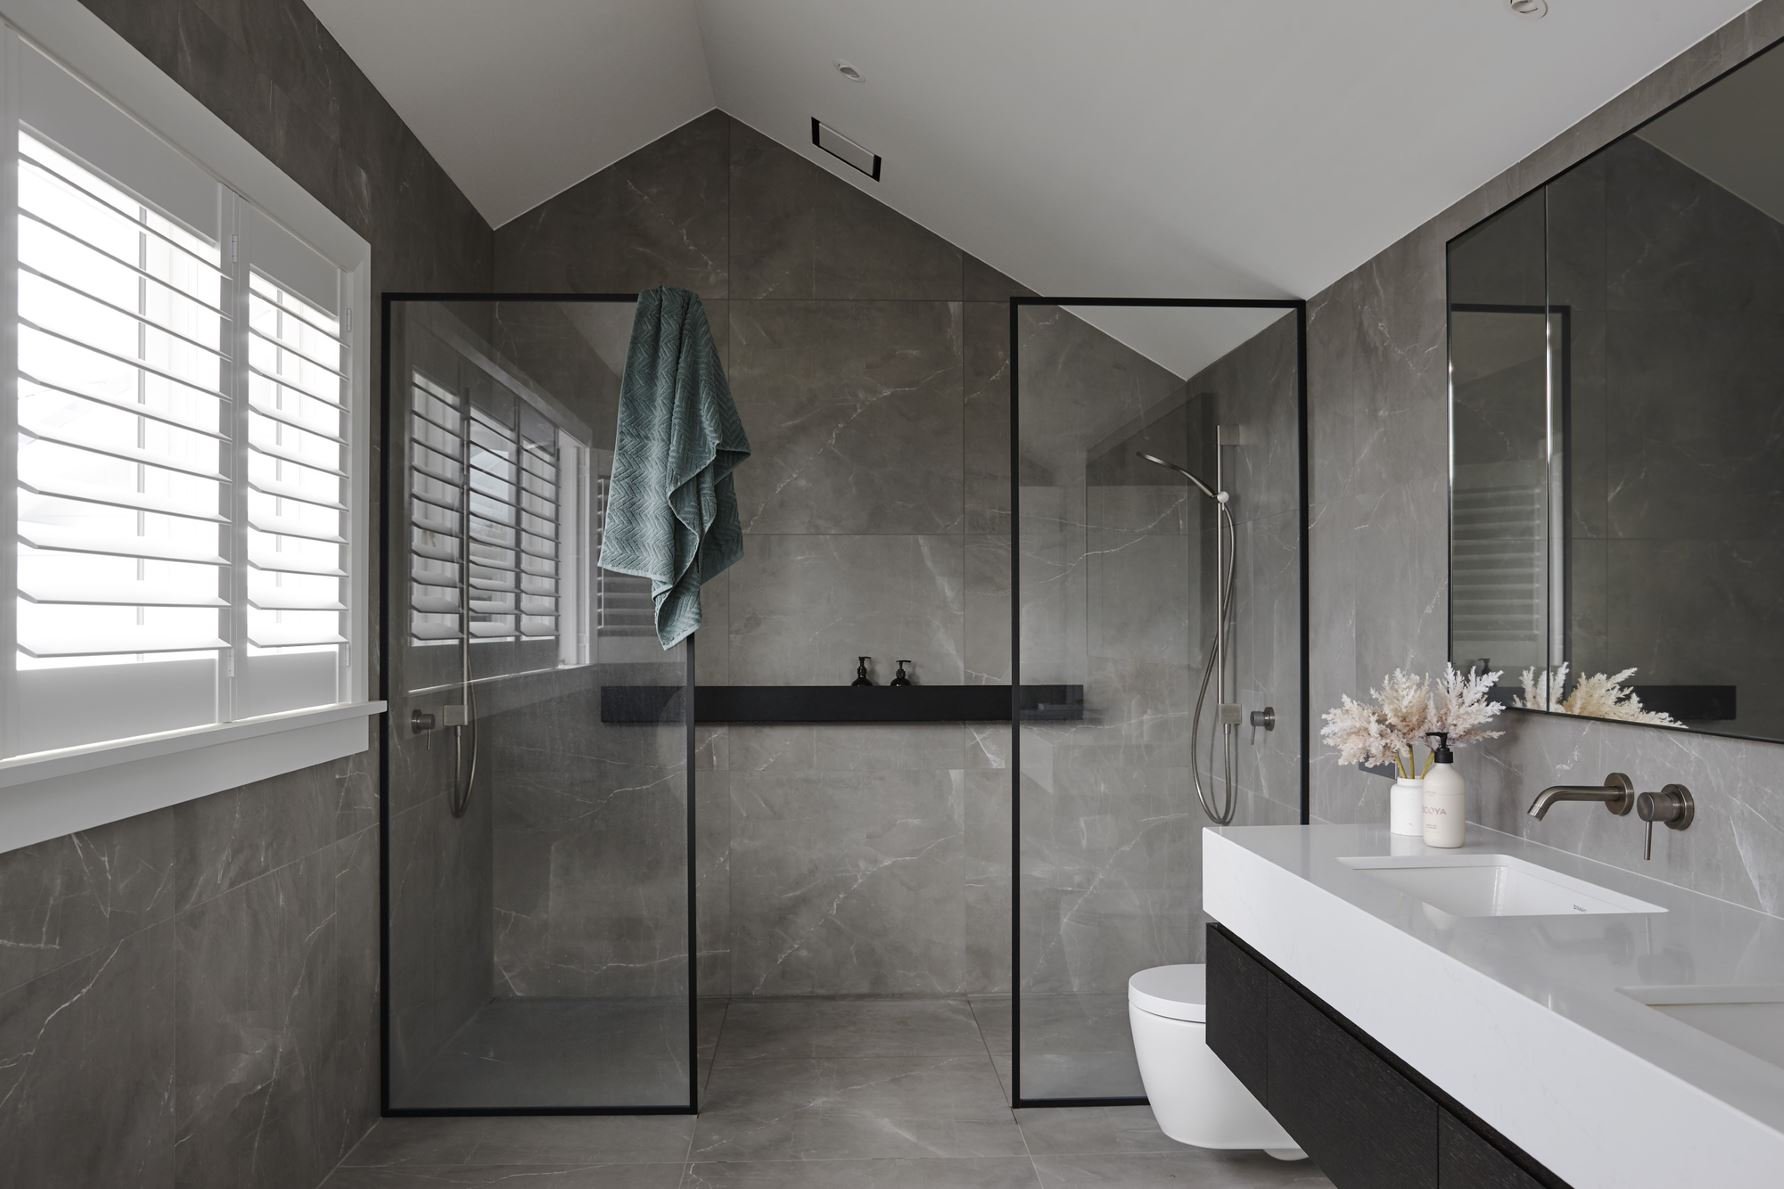
Shower Power
A curbless shower is great for a minimalist look. To achieve this the pitch of the floor has to be pre-prepared by a builder, so the glass can sit directly on the tiled floor rather than on top of a raised curb.
A tiled shower is a more luxe look than a shower unit, as it looks like part of the room. But remember, unless you’re re doing a shower that was already tiled, you’ll need council consent because of the waterproofing requirements.
Instead of a central shower drain, use a channel drain for a more contemporary look. These will need to be designed to the right size for your shower, and fitted by the plumber before tiling, often with a slight slope on the floor for easy draining.
Frameless shower glass is the most spacious option for a bathroom — it sits in a channel on the wall and floor so there’s no need for hinges. Shower glass doesn’t have to be boring! Most glass suppliers can cut glass in a variety of shapes and sizes to match your design aesthetic. You can curve the top, frame the glass in metal or black steel, or choose a feature like reeded glass.


A doorless shower is great for creating a sense of space but requires careful planning. The glass needs to be wide enough (at least 1000mm) to ensure water doesn’t spray out of the opening, creating one giant wet room!
If you’re short on space, putting your shower and bath behind one screen at the end of the room is a practical solution that won’t look cluttered. Think of it as a mini wet room.
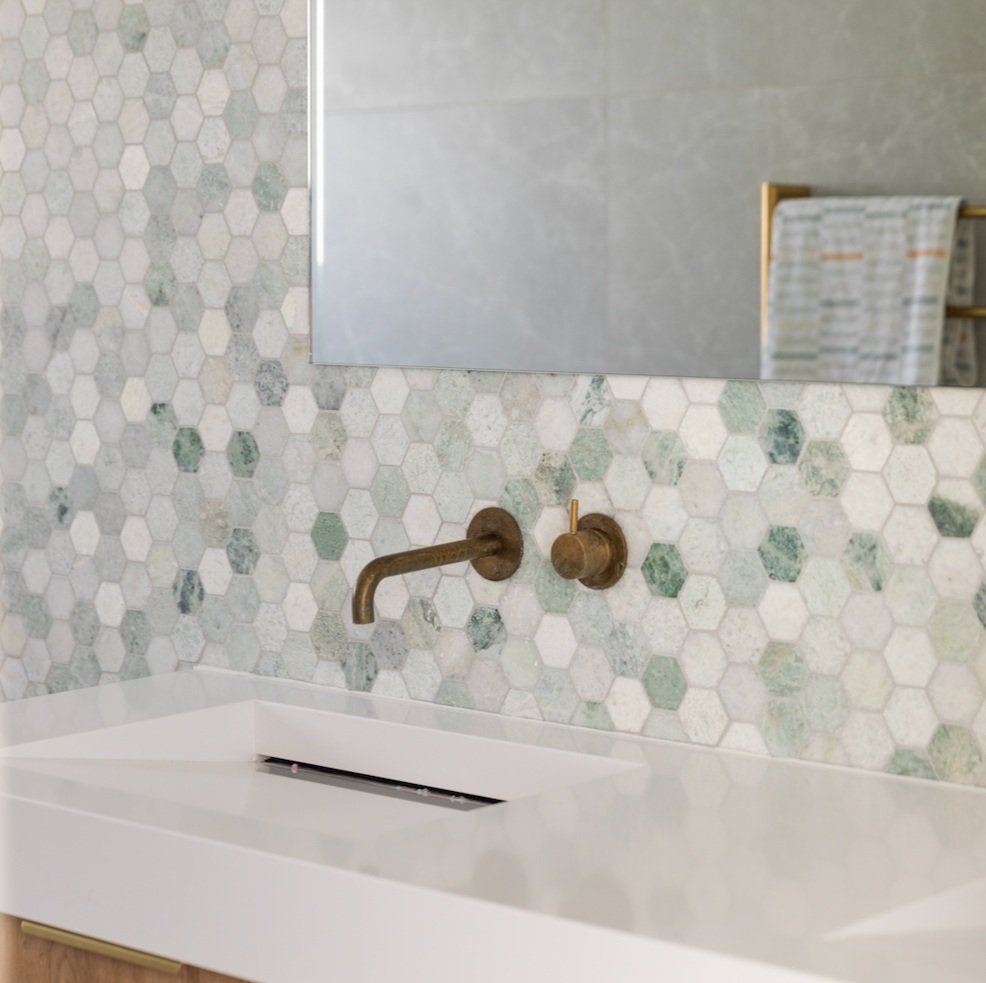
Many suppliers will only show you standard chrome shower hardware options, but shop around, because you can get a finish to match your tapware — from brass to black.
If you’re renovating, get a plumber to maximise your water pressure, and install a rain-fall shower head as well as a slide shower as flexible options for everyone.
Cabinetry tips
A double vanity means two people can use the room at once. You need a vanity at least 1500mm wide to achieve this, as you need some bench space in between and on either side.
Cabinetry fronts are an opportunity to bring in another layer of texture, and can feature colour, texture like woodgrain, shape like fluting or battens. You can even have your drawer fronts made of stone or porcelain tile the same as the rest of the room!
If your bathroom is all straight lines, adding a curve can soften it. Referencing the design elsewhere in the room like repeating a curve on the vanity and shower glass helps to strengthen it.
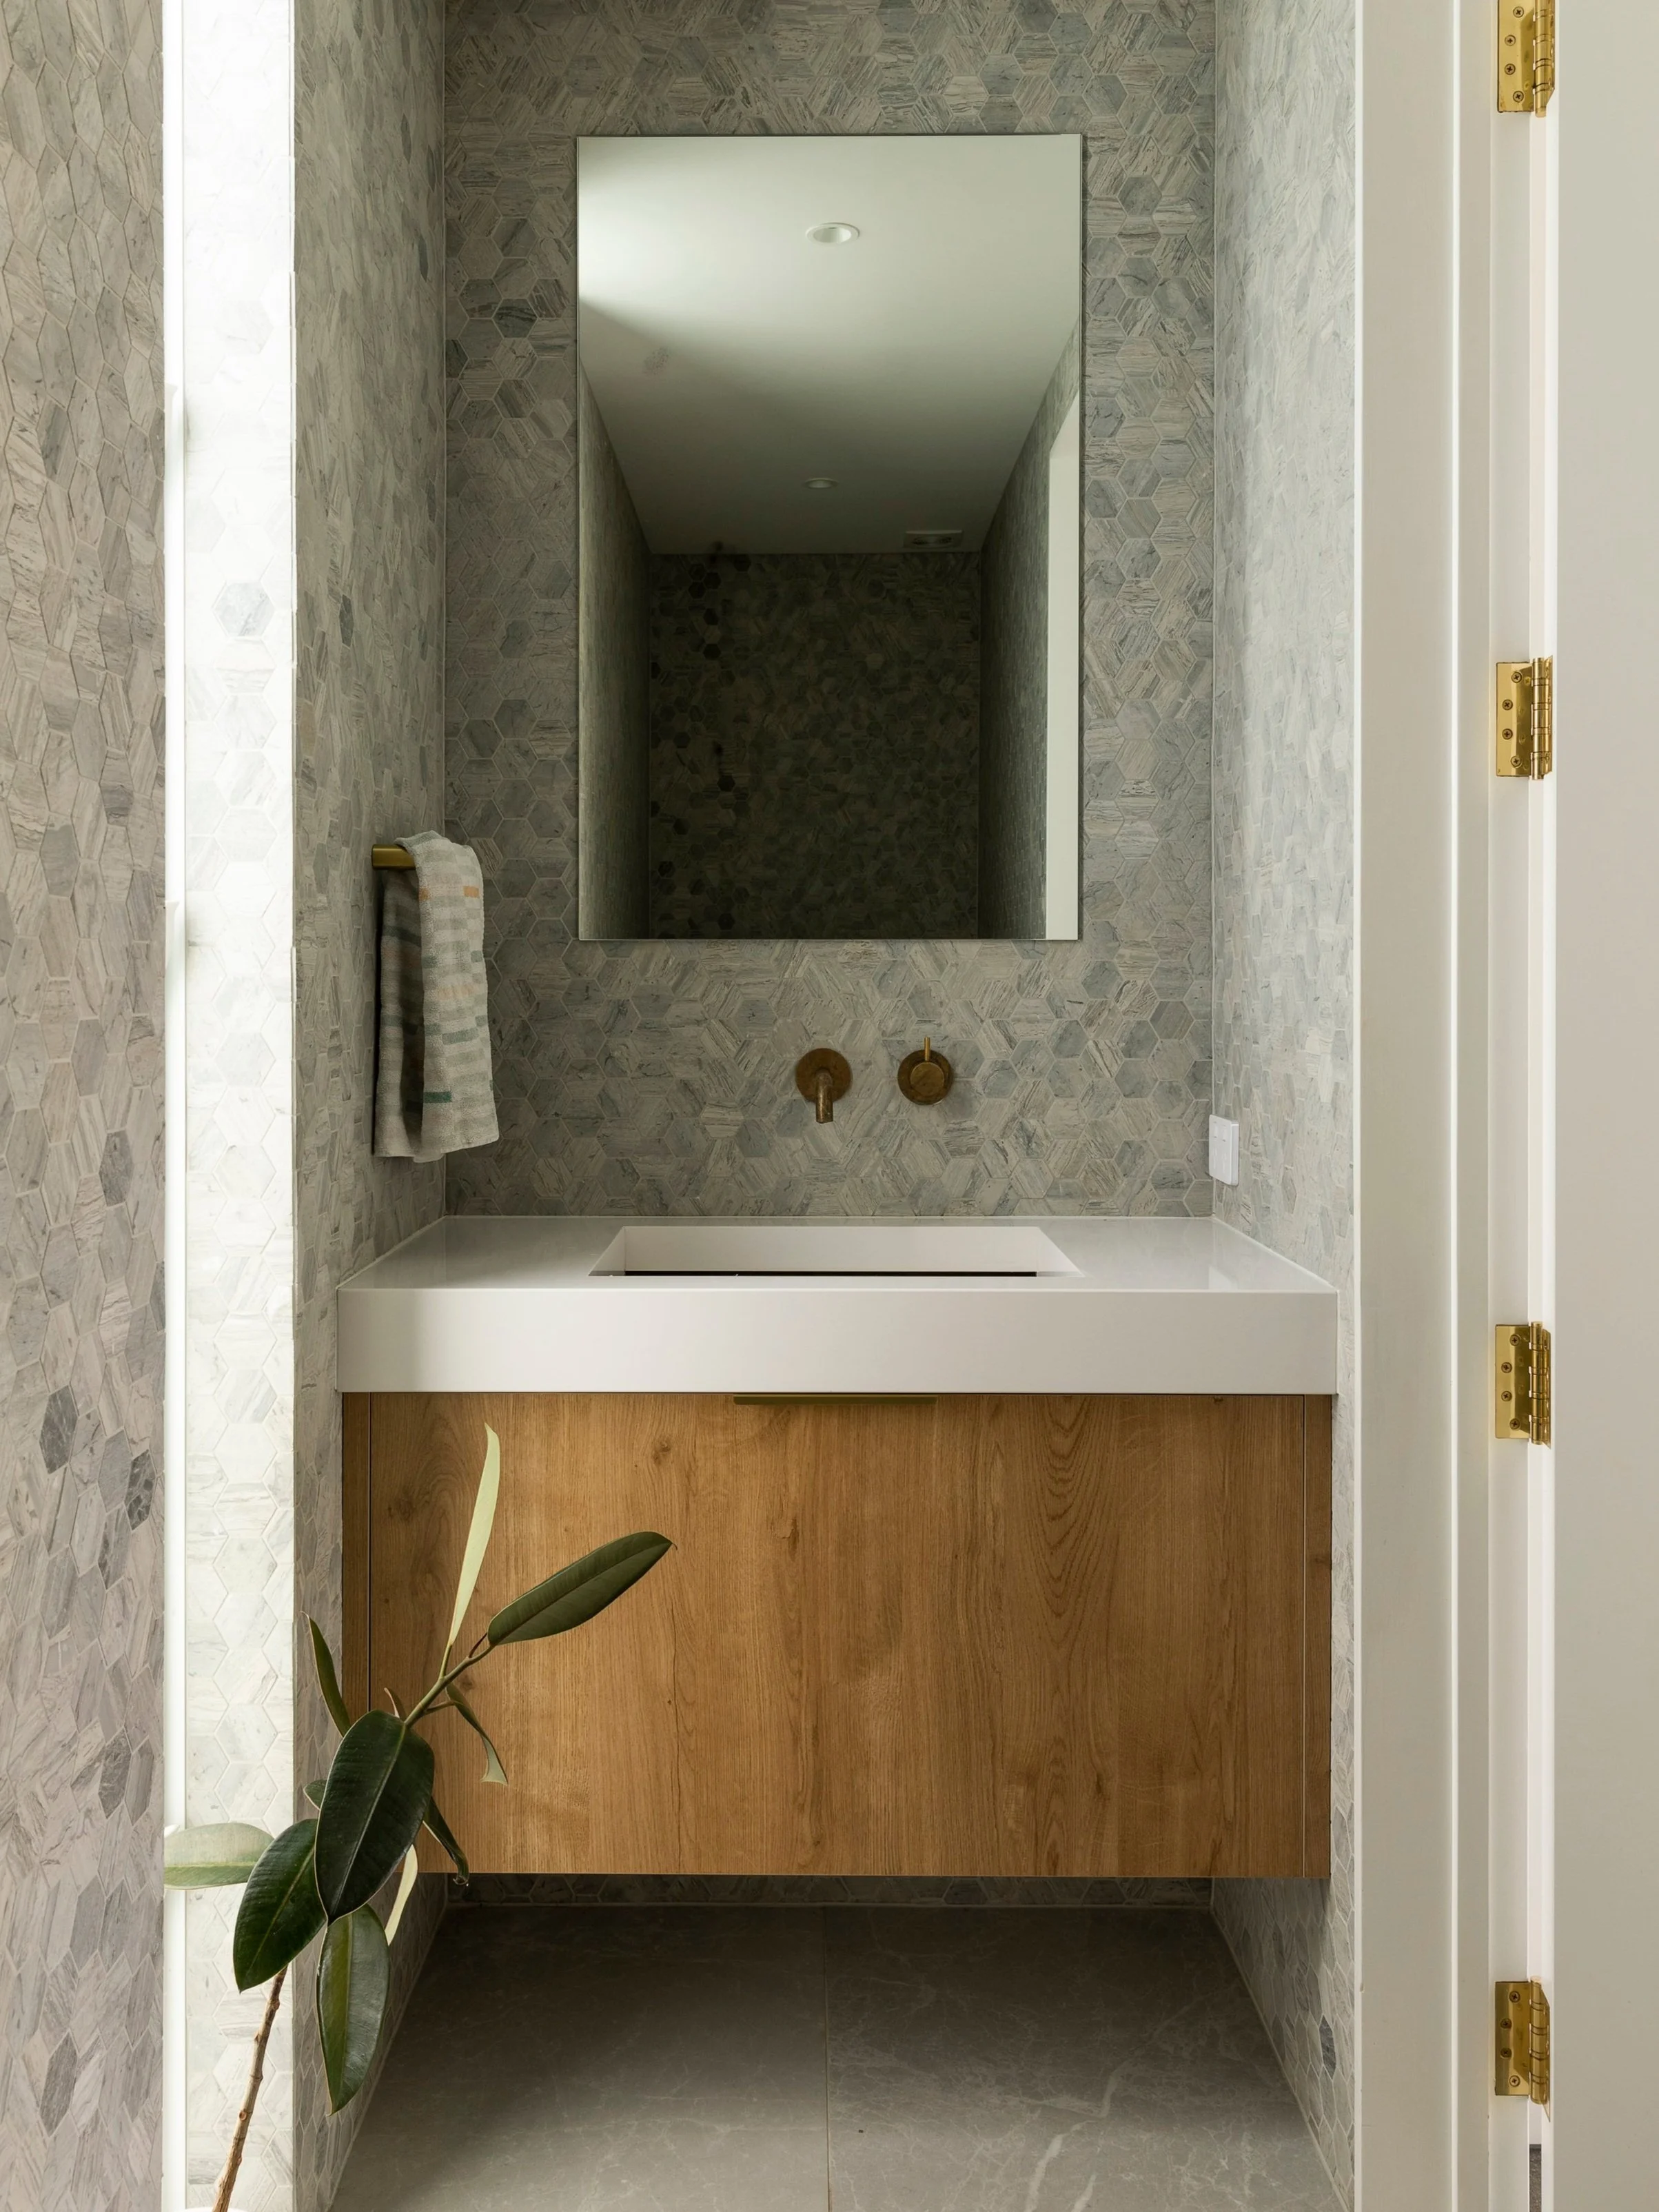
A floating vanity is the best option for a small space; it offers storage but doesn’t fill the room too much.

Build it in
Consider building your furniture in so it looks like it’s one. This bathroom has a vanity with a tiled top and a built-in bath clad in the same tile. Having too many textures and different surfaces in a bathroom can make it look more cluttered.
Time to reflect
Use your vanity and wall space as inspiration for choosing a mirror. A smaller wall hemmed in by other walls can benefit from a large mirror cut to fill the space completely. A larger space with double basins looks beautiful with double mirrors. Choose a statement mirror surround, shape and finish to add visual impact to the design without spending a lot.
Space saver
Use your stud bay (the space between wall framing) to add a recess. This gets lined when the wall lining goes in, then tiled to create the perfect ledge for products.


Tiles
Large tiles that mimic natural stone are calming, cost effective and practical. They create a spacious look, a slight texture that helps hide everyday marks between cleans, and they have a calming effect that makes you feel like you’re surrounded in nature. For your main bathroom tile choose a size as big as possible (at least 600mm x 600mm) for an expansive, luxurious feel.
Bathroom renovation order
1. Demolition.
2. Repairing of structural damage. Preparing the cavity to allow for the specific layout and products being used.
3. Room gets walled in plasterboard. Often GIB Aqualin is used.
4. Plumber repositions pipes and services, checks connections are up to standard.
5. Electrician installs just the wires for light, power points, accessories and heated floors.
6. Ceiling and walls are prepped, plastered and sanded.
7. Ceiling is painted along with any walls that won’t be tiled.
8. Waterproofing.
9. Plumbing of the built-in bath.
10. Tiling and grouting.
11. Installation of vanity and cabinets.
12. Fit off of lighting, power points, tapware, sinks, etc.
13. Shower screens and mirrors installed.